Showing posts with label C-Straight from the Nest. Show all posts

Cricut Banner Contest Entry #2 (My Favorite But Don't Tell #1)


I had originally planned to wait to share my Cricut Banner Contest entry until closer to the contest date, but it seems many of us are sharing on the Cricut Message Boards.  So once I shared this project on the MB on Tuesday, I decided I should post it here also. 

I used two Cricut machines and five cartridges to complete this banner:  Cricut Imagine and the Imagine Black & White cartridge, Cricut Expression with Straight From the Nest, Elegant Cakes, Calligraphy, and Everyday Cricut.

I had such a good time making this banner; it just seemed to all come together for me.  I began by printing sheets of cardstock in my Imagine machine.  Using the Black and White cartridge I printed the cardstock for the back layer using white cardstock with black print.  Next I printed the pink and black cardstock by printing on pink cardstock. 


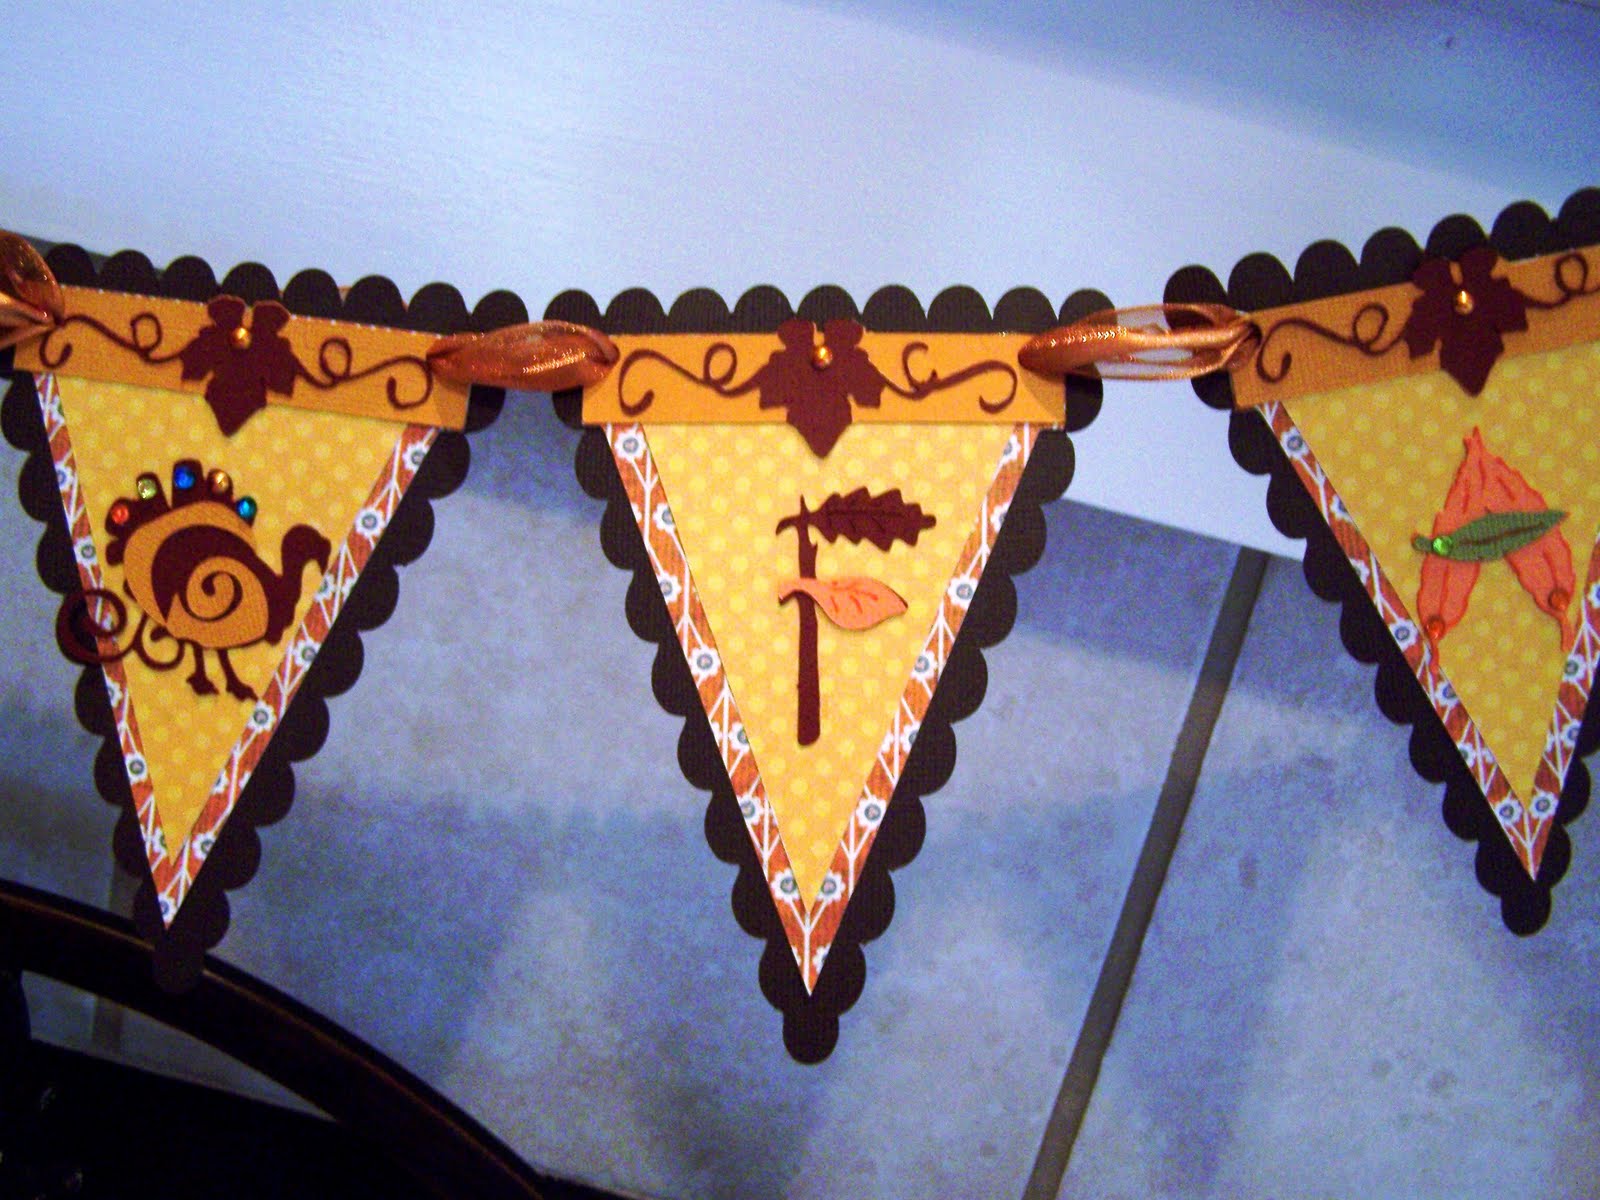
I had previously created a cut file in Cricut Design Studio.  I used Calligraphy to cut the base pennant layer using the black and white I cardstock I printed.  Next I cut the solid pink pennant layer.  And finally I cut the black and pink pennant layer.  I used my ATG and adhered all three layers together.  


Next I cut the white scalloped pennant tops.  At this point I moved on to the Elegant Cake cartridge cuts.  I started with the elegant scroll cut at the top of the pennant pieces.  I used a Xyron to apply adhesive to the scrolls and then attached the scrolls to the pennants. 

I cut the two piece elegant scroll frames with the Elegant Cakes cartridge.  I used solid black and solid white cardstocks for these cuts.  Again I used the Xyron to apply adhesive to the scrolls before attaching them to the white base layers.


Using bright pink cardstock and the Everyday Cricut cartridge I cut the word "Cricut".  I also cut to green, white, and black Cricut logos.  Using liquid glue, I glued the Cricut Logo pieces together and glued them onto two of the scroll pieces.  I glued the Cricut letters to the remaining scroll pieces.  I used pop dots to affix the scroll pieces to the pennant sections.

Using diamond bling, I added highlight of bling to the letters and scroll pieces.  I did not want to over do with diamond bling as I planned to add the pink crystals.

I am going to admit that I had to go on-line to find the pink crystals.  I knew what I wanted to do with this pennant, but had trouble finding the right crystals.  Finally I got lucky and found the pink crystals on ebay!! 

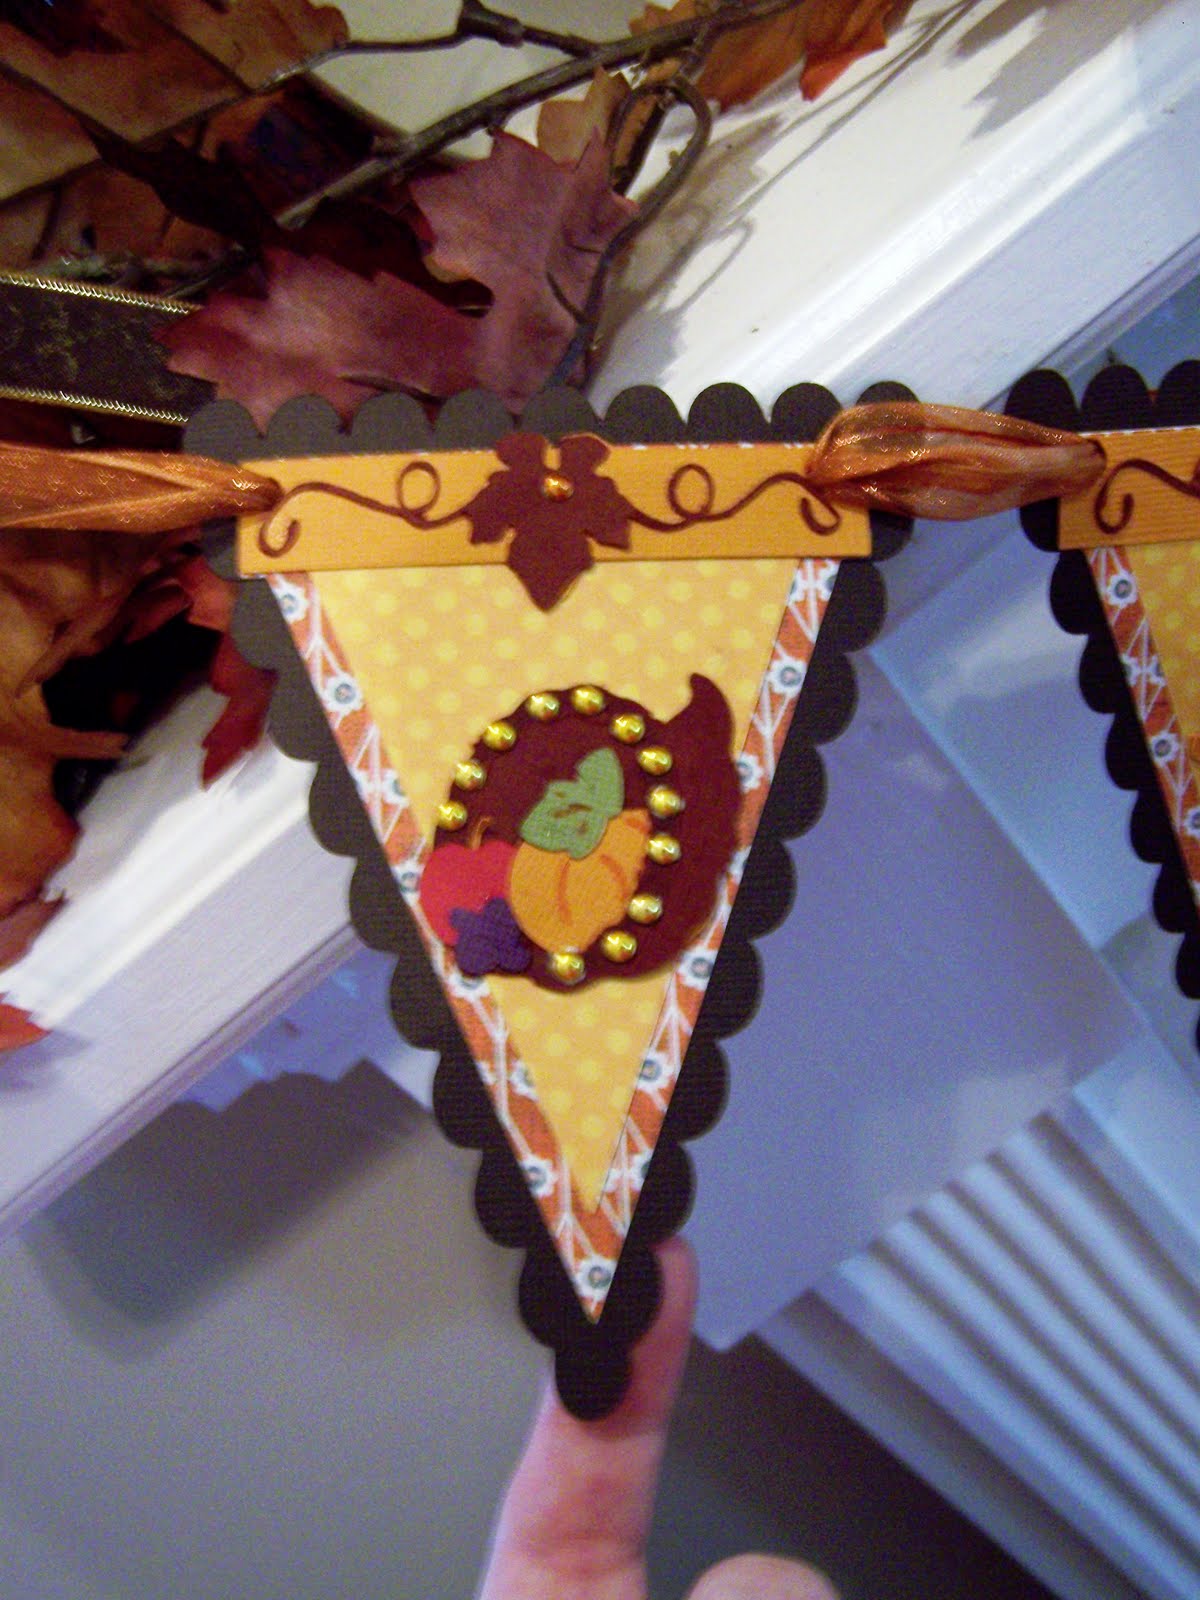
The crystals came with gold tone hardware to attach them to the pennant.  Sadly, gold tone did not work with my color scheme.  Then I remembered that I had a silver leafing pen!! Woo-hoo for the silver leafing pen.  It completely covered the gold as simply as coloring with a marker.  I will use this technique again!!  After the coloring, I pierced the pennant tips and attached the crystals.

The last step of the project was to add ribbons.  I used 1.5 inch wide white organza ribbon to tie the pennant pieces together.  I then added solid black ribbon as well as pink and white ribbons to the pennant.

I will admit that I am quite pleased with this pennant.  I viewed some fabulous banners on the Cricut MB, but I still like this one.  And while it may not win the contest, it made me happy to create it!!

Blog Hop, Blog Candy, and a Birdcage!


Happy Monday everyone!  If you are following the Bitten by the Bug2 blog hop you arrived here from Lori's blog - Welcome.  If you are one of my regulars popping by please do take a few minutes and visit all of blogs on the BBTB2 blog hop.  The Design Team members have created awesome projects to share. 

The challenge cut this week is the birdcage or bird house from the Straight from the Nest cartridge.  I chose to use this simply lovely birdcage to create a unique wedding card! 


I used three pieces of cardstock to cut the birdcage, a silver metallic for the top layer, a charcoal print for the middle layer, and a high glitter sparkle cardstock for the shadow layer.  Using scissors I removed the single bird from the cage and added my love bird couple.  I also added a little heart, a ribbon bow and a few gems to the cage.


Next I cut a gate fold card in soft pink cardstock.  I scored the folds with my scrorepal and affixed the birdcage to the left side of the card front.  Using the charcoal cardstock and the Picturesque cartridge, I cut for decorative corners for the front of the gate folds.


As you open the left side of the card the tag on the right side is revealed.  Using the same charcoal cardstock and a stamped image, I added a Mr. and Mrs. stamp to the middle of the tag.


The inside of the card was embellished with decorative corners which leaves lost of space to write a personalized message.


Before you head on your way, remember that I have blog candy!!!  Just leave a comment and you will be in the drawing for a $25 gift voucher from CUSTOM CROPS!!!  Who doesn't like to do a little free shopping?  I know I do!  I will draw a random winner on Thursday morning before I leave for the Circle Crop in Atlanta!

I hope you have enjoyed the blog hop. The final stop on the blog hop is at the blog of our beautiful and talented design team sister Krista.

BBTB2 Banner & Blog Hop


Hello everyone, welcome to the monthly Bitten By the Bug 2 blog hop. You may have arrived here from our sweet Carole's blog, or you may have just dropped in to check out my monthly project. If you did not start at the beginning after you finish here you may want to go to BBTB2 and check out the fabulous banners made by my fantastic design team sisters!

This week's challenge cut was selected by our design team sister, the lovely Beth (Runs with Scraps). Beth asked the design team to use any of the banners on the banner feature from the Country Life cartridge. I do not have this particular cartridge but there are other several other banners on several other cartridges. I used two different banners from two different cartridges to create my HAPPY FALL banner.


The scalloped base banner was cut using Tie the Knot. The floral print banner with the rectangular topper is from Straight from the Nest. I added an additional triangle from George and Basic Shapes to create more interest. The maple leaf flourish decoration across the top of each section is from the seasonal Thanksgiving cartridge, as are the images on the first, last, and middle banners. I used the cornucopia, the turkey, and the corn for the image banners. I finished each section of the banner with the I-Rock and assorted gems.


Orange sheer ribbon was laced through the holes on each section of the banner. I then tied the ends of the ribbon to the iron sconces on my mantel. The orange was a perfect color in that it blends well with the cardstock colors and the leave garland on the mantel. I love decorating for fall and this fun banner added to the overall effect.


So did I mention a blog hop??? Did I tell you that with the blog hop comes BLOG CANDY? What? I forgot to mention that??? I have great blog candy for one lucky reader!!! I am giving away a $25 gift voucher from CUSTOM CROPS so one lucky person will get to do a bit of FREE shopping!!! All you have to do is leave a comment under this post. A random winner will be selected on Thursday of this week.

After you post your comment you will be continuing along on the blog hop. Your next stop is at our amazing Donna's fabulous blog. I cannot wait to see her awesome project; she inspires me every single week!!!

Thanks for coming by today. I will be back tomorrow with another new project.