Like my friend Diane (Capadia) who also received a bouquet, I too had requests to create a cut file or instructions (or both) to create the Mother's Day Flower Bouquets which we received from Cricut to help spread the joy of the Criuct Circle! It is a bit funny but both Diane and I came up with the technique, though we used different cartridges.
Upon examination and dissection of my bouquet I established that the individual flower cuts used to create the each 3D flower each had ten petals. Using Cricut Craft Room's search image feature, I searched every flower linked into the database and discovered that my flowers were created using the Serenade cartridge. You truly could use any of the multi-petal flowers on any of a multitude of cartridges - even Plantin Schoolbook or George. I went with Serenade because I feel certain that this was the flower used by the designers at Cricut and because I like the cut.
The cut file is available to download here on my blog - see Cricut Craft Room files in the left column.
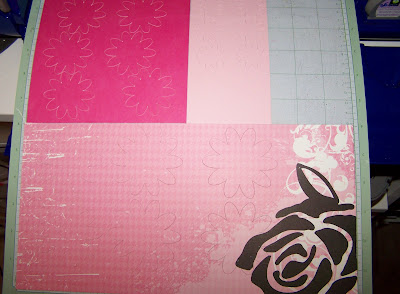
In the photo above you can see my "page 2" of the cut file. I set this cut file up to cut six flower on each page, EXCEPT page 1. On page 2 you see three areas that have been cut: the upper left and right contain the cuts for the flower centers. The bottom half of the mat contains the cuts for the back of the flowers.
Pierce a hole in the smaller back flower and attach a floral stem. Atop the floral smaller flower add one of the large background flowers from "page 3" of the cut file.
The CCR cut file has a total of four pages - page 1 contains four 3.75 inch flowers - the flowers that will be folded into quarters and used under the smaller center flowers. For each 3D flower you will need to fold all four of the flowers into quarters.
Fold the four flowers in half, then in half again, adding adhesive dots to hold the folds, yet leave a 3D effect.
Affix the four folded flowers to the background flower.
For each flower you will need two of the flowers from page two of the cut file, one each of the two smallest flowers. And you will need a button or brad for the flower center.
Layer the flowers and together and top with the button or brad.
Affix the flower centers to the middle of the 3D flower. If you have not already done so, attach the leaf to the back of the flower!
These flowers are really soooo easy to make - and they are a big visual bang for a little effort! If possible use double-sided cardstock to cut the flower on page one of the cut file (the folded flowers), You can see I used black and white double-sided cardstock.


